*2020 Update: I now get my hair done professionally and have gone back to back to a more maintainable blonde! (See my current hair on my Instagram by clicking here.)
I consider myself to be a sort of hair-bleaching expert. Self-taught through trial and error, of course. However, I have bleached my hair at home for a few years now and have pretty much mastered the art of how to bleach hair safely.
Believe it or not, I naturally have medium to dark brown hair. I decided I wanted to bleach my hair in high school, and not thinking that I could do it myself, I went to the hair salon. One thing that frustrated me about going to the salon was that they wanted to gradually lighten my hair, so they put in highlights all over. I would then go back to the salon weeks later for the next round of highlights, continuing the process. Not only was this annoying, but it was also very, very expensive.
So…I decided to teach myself how to bleach hair at home. I have tried a ton of different products and bleaches and finally, have landed on a process that gets me the white-blonde look that I love. Keep in mind that I usually have someone help me with this process (my mom :)) so that I make sure to get all of my roots and the back of my head.
Disclaimer: I am not a professional! This is simply what works for me and my hair and how to bleach hair that works the best for me. Don’t sue me if all of your hair falls out.
Supplies Needed:
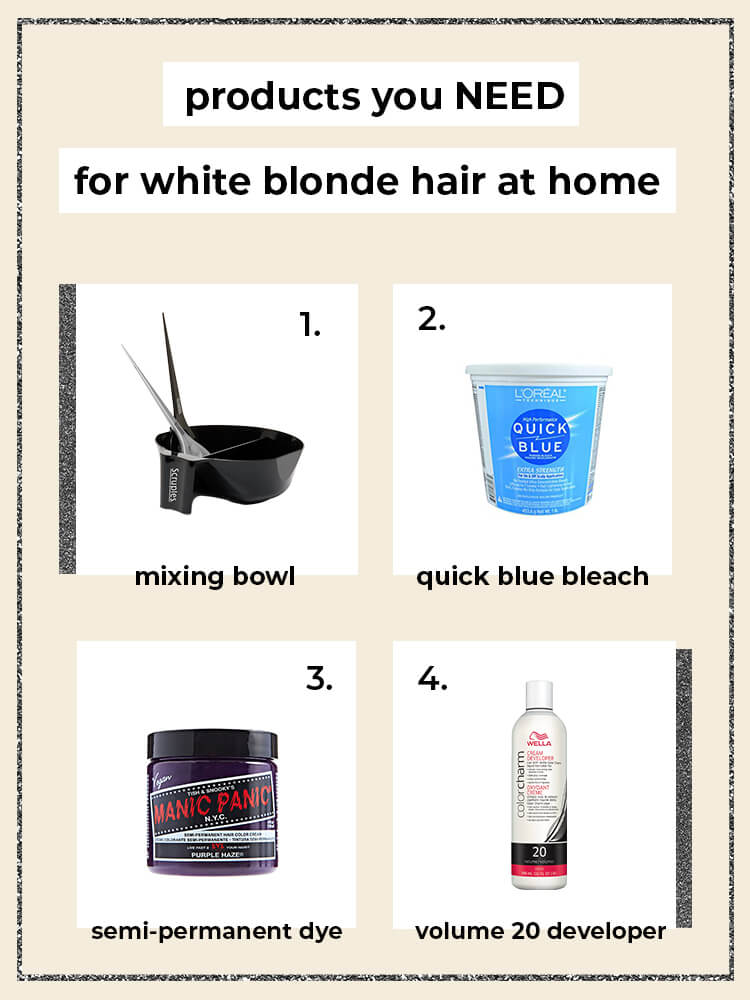
-Hair color mixing bowl and brush
–Manic Panic Semi-Permanent Dye
Step 1
I like to bleach my hair on the second day after washing it. Not really sure why, but I find that dirty hair works better for bleaching and coloring. Always bleach hair when it is dry! Section off your hair into more manageable parts. Bleach will work faster and lighten quicker on your roots, because of the heat that comes off of your scalp.
Make sure to brush out your hair and get all of the knots and tangles out of your hair before bleaching your hair.
Step 2
Mixing up your bleach is a crucial step to making sure your hair turns out right. I like to use Volume 20 developer, which I get from Amazon. It’s not too expensive (usually about $10-15), and works well with the powder bleach.
After you find your favorite developer, you are ready to start measuring out your mixture. For every 1 part of powder bleach, use 2 parts developer. My favorite bleach to use is L’Oreal’s Quick Blue (click here to buy). It comes in a huge tub and lasts forever. This method is so much more economical than buying pre-packaged bleach box kits at the drugstore. Trust me! I used to use those.
L’Oreal Quick Blue can be bought on Amazon and is pretty powerful stuff. Make sure you are wearing gloves throughout the whole process (including mixing), so your hands don’t get burned. I like to mix my bleach up with the developer in a hair coloring bowl for easy application.
Step 3
Once you’re ready to apply the bleach, make sure you wear a baggy T-Shirt that can get dirty, or lay down some towels around you. Anything the bleach lands on will most likely be ruined. Trust me…I’ve learned this the hard way.
Apply the bleach from your mixing bowl with a hair coloring brush. Start painting your hair in small sections, starting at the tips of your hair and working the bleach upwards. Remember, your roots will lighten faster than any other part of your hair. Leave your roots for last if you can.
Tip: Make sure to get EVERY inch of your hair. If you miss even a small section, it will be incredibly noticeable. Focus on the nape of your neck and hairline to make sure no strand gets left behind.
Step 4
I like to leave my bleach on for about 30-35 minutes. It honestly depends on how dark your hair is to begin with, but you will know it’s time to rinse the bleach out when your hair appears to be a pale yellow color. Check to make sure that your hair is all relatively the same color (roots vs. ends.)
Step 5
After waiting for your bleach to fully lighten, hop in the shower and rinse out the bleach from your head. I like to use a color-safe shampoo during this step. After rinsing out, let your hair air dry and check to see if it is the desired pale-yellow color. If not, you may need to repeat the bleaching process and do it all over again. Usually, people starting with dark brown or black hair will have to repeat the bleaching process at least 2 times.
Step 6
After reaching a pale yellow color, your hair is ready to be toned. Toning is the crucial and most important step in getting white-blonde hair. The process of toning your hair helps to counteract the yellow and gold tones that the bleach brought out, and instead make them a more bright white color.
My favorite toner to use is actually a semi-permanent dye from Manic Panic. Don’t worry; it works well and is the perfect color to cancel out any golden colors. Mix your toner up using the same 1:2 ratio of dye to the developer as described before. Apply the toner all over your hair and roots.
You won’t need to leave the toner on for as long as the bleach because it is, well, purple. Bleached hair takes very easily to dye because it has essentially just been stripped of all-natural color in the bleaching process. I like to leave my toner on for 15-20 minutes.
Rinse out your toner and let your hair air dry again. Voila! You now have perfectly toned, white-blonde hair.
Have you ever learned how to bleach hair at home?
Pssst! If you liked this post + learned something new, I would love for you to share it with your friends. Sharing this post takes just a few seconds + helps with the growth of this blog. Click the blue social sharing buttons to the left or at the top of this page. Thank you!
*This post does contain affiliate links. These are the exact products I personally use to dye my hair.*

