Thinking of starting a blog but don’t know where to begin? This is the best guide to starting a money making blog from the beginning!
I’ve been blogging for over a year now, and let me tell you: it’s awesome. Blogging has changed my life for the better and allowed me to tap into doing what I am truly passionate about. However, I know how daunting it may seem to start a blog. I’m here to tell you it’s not as hard as you may think it is to start a blog, (and I have helpful posts about getting started, like this post about how to gain Pinterest followers as a new blogger!)
This post is meant to be a step-by-step guide on how to start a blog of your own! I have followed these exact steps (through some trial and error), and swear by the process explained below.
Without further ado, let’s get you started on the journey of how to start a blog!
How to Start a Blog in College
Side note: If you choose to use Hostgator, the hosting company that I recommend in this post (and have always used as a blogger), then I will receive a small commission. I have a coupon code for you to receive up to 60% OFF your order by using the code EMMA60. Purchasing a HostGator package through this post gives me a small reward for helping a new blogger find the awesomeness that is HostGator 😉 If you don’t want to use my code to receive up to 60% OFF, that’s fine and you can go directly to whichever website hosting you choose.
Step 1: Hosting (it’s SO CHEAP to start!)
I know what you’re thinking: can’t I just sign up for a free blog on some website instead of self-hosting?
Well, you could do that. But please don’t. 😂
Self-hosting is perhaps the most vital part of how to start a blog. It’s a necessary step to take if you want to have your very own WordPress.org blog that is completely and 100% your own. It allows you to have complete and total control of your website or blog, instead of just “running” a blog on someone else’s site (WordPress.com, Wix.com). If you want to protect your content against spam, hackers, and copyright, you need to get web hosting.
While there are tons of options between hosting programs, I truly believe that HostGator is the best. HostGator is the program that I use myself for EmmaLenhart.com, and I have experienced precisely 0 problems with my site since using HostGator. Plus, their customer service is freaking amazing and I’ve called them for help so many times in the past without any hesitance.
The best news? I have a coupon code for you to receive up to 60% OFF your order by using the code EMMA60. (I wish I had a coupon code when I got started with HostGator. I’ve been using them for over 3 years now to run this very blog!)
HostGator allows you to claim your own domain, create custom email addresses (like mine, hello@emmalenhart.com), and more. Plus, HostGator has amazing customer support and they are always willing to work with their customers on any problems that may arrive.
If you choose to use HostGator for your domain + website hosting, use my coupon code EMMA60 to receive up to 60% off your order!
Here’s a step by step guide for getting set up with HostGator:
Installing HostGator into Your Blog
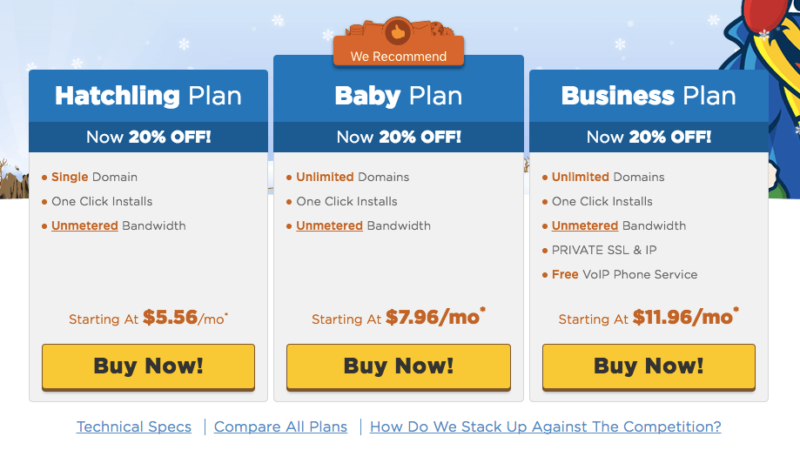
- Navigate to HostGator.com by clicking here. Select “Web Hosting” from the navigation bar at the top of the site. Here, you will find options for buying your web hosting (see picture below.) I pay for the Baby Plan every month, but pick the plan that seems to best fit your needs!
- After signing up for a HostGator account, log into your account and go to your CPanel (this is what HostGator refers to your Dashboard/Home Page as.)
- Navigate to the Software/Services tab, and click “Quick Install.”
- Locate “WordPress” under the column titled “Popular Installs.” Then, click Install WordPress.
- Fill out the form that appears. This will include your site name (domain), Admin information, etc.
- Click “Install WordPress” and watch the progress bar load!
Step 2: Blog Design
Your WordPress blog will look pretty bare when you first log in. Don’t worry! It’s simple to pick a new theme and start blogging. The design of your blog is what will give readers their first impression of you, so you want to make sure things look pretty + professional!
How to Choose + Install a Theme
If you don’t want to spend any more money on your blog, I would recommend finding a free theme for your blog. There are lots of free options out there and it honestly just takes some trial and error to find something you like!
To find a theme:
- Log into your WordPress site.
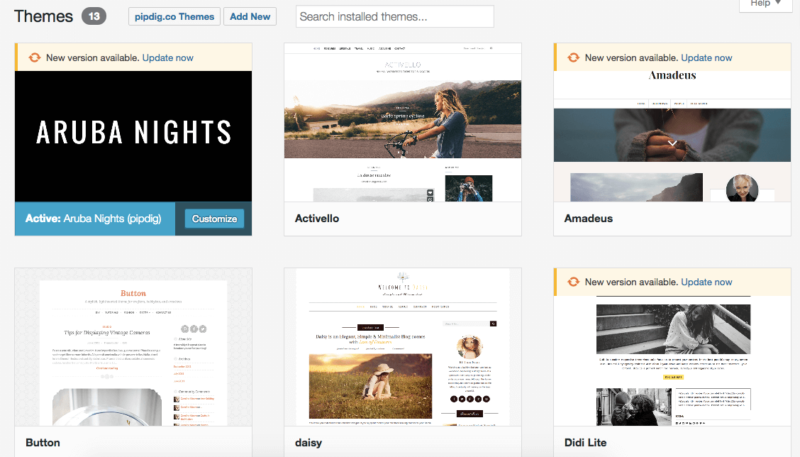
- Navigate to “Appearance” in the left-hand column of your back-end. Then, click “Themes.” It should look like this (picture below.)
- Click around and search until you find a theme that you like.
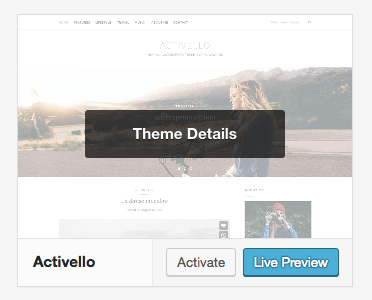
- You can click “Live Preview” by hovering over the theme to preview what the theme would look like on your blog. This is temporary (picture below.)
- Once you find a theme you like, click “Activate.” This will install the theme on your blog!
Tip: to fine-tune your new theme, navigate to “Appearance” once again and click “Customize.” This will bring up a ton of different settings your specific theme has, which you can play around with until they reach your liking. This is how you change things like heading size/color, font type, adding a sidebar, etc.
Which theme do I use for EmmaLenhart.com?
I personally use a paid theme for EmmaLenhart.com by Pipdig. Pipdig creates a ton of beautiful themes, made specifically for bloggers. I highly recommend these themes for those starting a blog!
Pages + Posts
Now that you have your blog’s theme selected, it’s time to add some content. This will vary, depending on what type of blogger you want to be. However, WordPress works the same for all of us.
WordPress works with things called “Pages” and “Posts.” These two things are what will help you populate your new blog with content.
Pages are static and will usually be displayed on a navigation or menu bar. My pages include “About Emma + Contact”, “Career”, “Lifestyle”, “Fashion”, “College” and “Ecourse.” You can find these pages on my main menu (the bar at the top of EmmaLenhart.com before you click on anything else.)
Posts are where you will actually write your separate blog posts, draft them, and finally, publish. Figuring out how to write a post may seem tricky at first, but it’s really very simple. After selecting “Posts” and “Add New” from the column on the left column in your WordPress account, you will see something that looks like this: (image below)
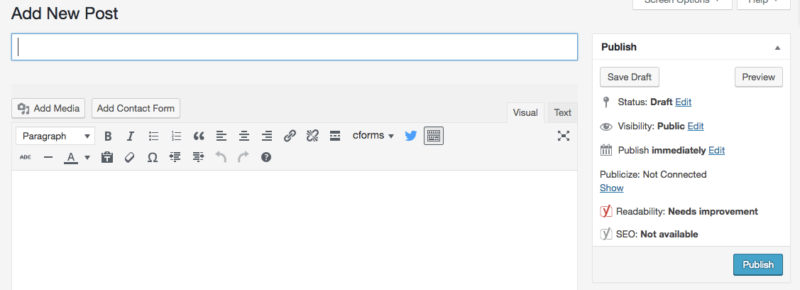
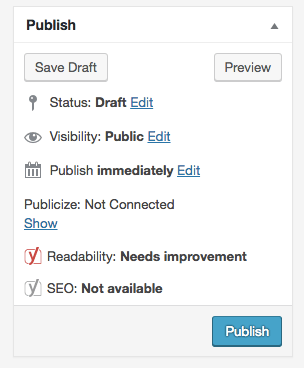
Once you write out your post, you can select to either save it as a draft, preview the post, or publish it (image below.) You’ll also be able to see how your post is doing in terms of readability and SEO. This will be explained in more detail in the next “Plugins” section.
Step 3: Plugins
Am I a nerd because I love talking about WordPress plugins? Maybe.
Plugins are the little accessories you can add to your WordPress blog to spruce it up and add more functionality. Plugins can involve anything from social media (Pinterest wall, Facebook Page Like Button) to email marketing (contact form, mailing list sign-up.) There is a huge marketplace of plugins, and I am constantly on the lookout for the next, new plugin I haven’t heard about yet to add to my site.
Top Recommended Plugins
To skip the learning curve, I’m listing out some of my favorite plugins that I recommend you add when starting a blog.
- Better Click to Tweet. This plugin allows you to insert a “Tweet this” button into your blog post. This is an awesome feature to have for your readers so that they can share your post easily to their Twitter followers.
- Disqus Comment System. This plugin is vital. Disqus is a program that seamlessly integrates with WordPress blogs and will replace the default commenting system. Disqus runs so much smoother, connects to Facebook, and looks a lot more professional (in my opinion.)
- Yoast SEO. This is the best plugin for SEO that I have found so far. Pretty much all lifestyle bloggers out there use it or swear by it, too. Yoast will guide you when writing blog posts to help boost your SEO score and make sure your post is easily readable.
- Lightweight Social Icons. This plugin allows you to display icons for your blog readers to click on and follow you on social media.
- Instagram Slider Widget. Want to display your latest Instagram photos on your blog? This plugin is perfect for doing just that!
Once you install a new plugin, navigate to “Installed Plugins” under the “Plugins” category on the left-hand column in your WordPress account. Once you find your new plugin in the list, click “Activate.” Once your plugin is activated, it will appear blue in the list (image below.)

There are lots of other great plugins out there! Check out this guide for “26 Widgets to Dress Up Your WordPress Sidebar” by Mel of A Prettier Web here.
And that’s it! You are now equipped to start a blog and have it be successful. If you’re ready to start your blog, CLICK HERE to head on over to HostGator and get blogging!
Have any other questions about how to start a blog? Feel free to email me (hello@emmalenhart.com) or tweet me! I would love to answer them or give advice. Happy blogging 🙂
*This post does contain affiliate and referral links.*


